The Best Fluffy Pancakes recipe you will fall in love with. Full of tips and tricks to help you make the best pancakes.
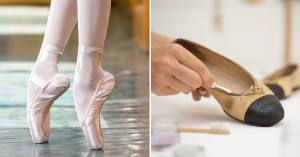
How to Tie Ballet Shoes
In ballet, every detail matters, from your posture to your performance attire. One often overlooked aspect that can significantly impact both comfort and performance is how well you tie your ballet shoes. Whether you’re a seasoned dancer, a fitness enthusiast exploring ballet for its elegance and exercise, or a dance aficionado eager to understand the intricacies of this art form, knowing how to tie ballet shoes properly is crucial.
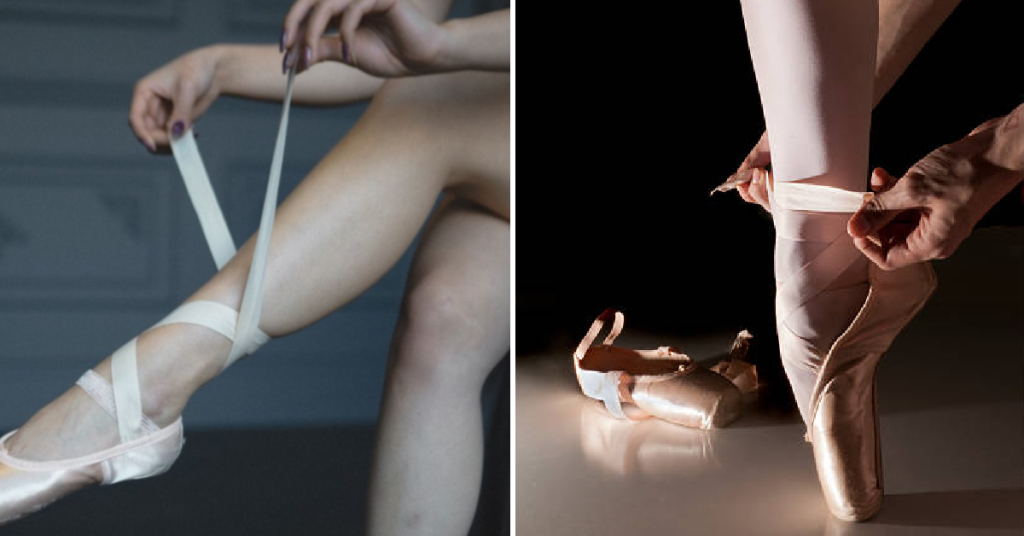
This guide will walk you through the steps of preparing and tying your ballet shoes, ensuring they provide the support and comfort needed for those perfect pirouettes and graceful arabesques.
Preparing Your Ballet Shoes for Tying
Before you even begin the process of tying your ballet shoes, it’s essential to prepare them correctly. This preparation ensures that the shoes fit well and provide the necessary support during your dance routines.
Fitting the Shoes
The first step is to ensure that your ballet shoes fit perfectly. Ill-fitting shoes can cause discomfort and even injuries. When trying on ballet shoes, make sure there’s no extra room in the toe box but also ensure that they aren’t too tight. Your toes should lie flat and not be cramped.
Sewing the Elastic Bands
Most ballet shoes come with elastic bands that need to be sewn onto the shoes. These bands help keep the shoes securely in place. To sew them on, wear your ballet shoes and mark the ideal placement of the elastic bands. Typically, they are sewn in a crisscross pattern over the instep to provide maximum support.
Breaking in the Shoes
New ballet shoes can be stiff and uncomfortable. To break them in, bend and flex the sole gently. Some dancers prefer to wear their shoes around the house for short periods to allow the materials to mold to the shape of their feet.
Step-by-Step Guide to Tying Ballet Shoes
Tying ballet shoes is an art in itself. The technique ensures your shoes stay secure without causing discomfort. Here’s a detailed step-by-step guide to tying your ballet shoes:
The Basic Ballet Shoe Knot
- Position the Shoes Properly: Start by putting on your ballet shoes and ensuring they are sitting comfortably on your feet. The shoe should snugly fit around your foot without any gaping.
- Cross the Ribbons: Take the two ribbons on each foot and cross them over the top of your foot, making an X shape.
- Wrap Around the Ankle: Bring the ribbons around the back of your ankle, and cross them again at the front.
- Tie a Secure Knot: Bring the ribbons back to the inside of your ankle and tie a secure knot. Make sure it’s tight enough to hold the shoe in place but not so tight that it cuts off circulation.
Tying the Crossed Loop Method
- Begin with the Basic Knot: Start by following the steps of the basic ballet shoe knot.
- Create Loops with Ribbons: Instead of tying a simple knot, create loops with each ribbon.
- Cross the Loops: Cross the loops over each other to form a secure and decorative knot.
- Tuck in the Ends: Tuck the ends of the ribbons under the loops to avoid any loose ends that could trip you up.
Securing the Elastic Bands for a Snug Fit
- Pull Elastic Bands for Tightness: After tying the ribbons, adjust the elastic bands to ensure they are providing sufficient support.
- Secure with a Knot: Tie the elastic bands in a small knot to keep them from slipping.
- Check for Comfort: Make sure the bands are not too tight, as this can cause discomfort and restrict blood flow.
Adjusting the Ties for Comfort and Performance
- Test Movement: Before beginning your dance routine, move your feet around to test the comfort and security of the ties.
- Re-adjust as Necessary: If you feel any discomfort or if the shoes feel loose, re-tie the ribbons and adjust the elastic bands.
- Ensure Flexibility: Make sure the ties do not restrict your foot’s flexibility, as this is crucial for executing various ballet movements.
Tips and Tricks for Keeping Ballet Shoes Secure
Keeping your ballet shoes secure is essential for both performance and safety. Here are some tips and tricks to ensure your shoes stay in place:
- Use Rosin: Rosin can help provide extra grip. Apply a small amount to the soles of your shoes to prevent slipping, especially on smooth surfaces.
- Double Knotting: Double knotting your ribbons can provide extra security, ensuring they don’t come undone during your performance.
- Elastic Ribbon Loop: Create an elastic ribbon loop to slide your foot into, providing additional stability and preventing the ribbons from slipping.
- Break In Your Shoes: Wear your shoes around the house to break them in and avoid discomfort during performances.
- Check for Wear and Tear: Regularly inspect your shoes and ribbons for any signs of wear and replace them as needed to maintain safety and performance.
Common Mistakes to Avoid When Tying Ballet Shoes
Even experienced dancers can make mistakes when tying their ballet shoes. Here are some common pitfalls to avoid:
- Over-tightening: Over-tightening the ribbons can restrict blood flow and cause discomfort. Ensure the ribbons are snug but not too tight.
- Incorrect Ribbon Placement: Incorrectly placing the ribbons can lead to an insecure fit. Make sure to cross the ribbons over the top of your foot and wrap them around your ankle properly.
- Ignoring Elastic Bands: Ignoring the elastic bands can result in a loose fit. Make sure to secure the bands properly for added support.
- Choosing the Wrong Size: Wearing the wrong size can affect performance. Always check the fit before using.
- Neglecting Maintenance: Failing to maintain your equipment can reduce its lifespan. Regularly check for wear and tear.
FAQs about Tying Ballet Shoes
How tight should I tie my ballet shoes?
The ribbons should be snug but not so tight that they cut off circulation.
Can I use any type of ribbon to tie my ballet shoes?
It’s best to use ribbons specifically designed for ballet shoes as they are more durable and provide the necessary support.
Should I double knot my ribbons?
Double knotting can help keep your shoes secure, especially during performances. However, make sure it’s not too tight to avoid discomfort.
How often should I replace my ballet shoes?
It depends on how often you use them. Regularly check for wear and tear, and replace them as needed to maintain safety and performance.
Can I adjust the elastic bands on my ballet shoes?
Yes, you can adjust the elastic bands to provide a snug fit. However, make sure they are not too tight, as this can restrict blood flow and cause discomfort.
Conclusion
Tying ballet shoes may seem like a small detail, but it plays a significant role in your overall performance and comfort. By following the steps and tips outlined in this guide, you can ensure that your ballet shoes are always tied correctly and securely.
Remember, practice makes perfect. The more you practice tying your ballet shoes, the more natural it will become. For personalized advice and further tips tailored to your needs, consider booking a session with one of our expert stylists who can guide you through the process.
Ready to perfect your ballet shoe-tying technique? Start practicing today and experience the difference it makes in your dance performance.